
When there are at least two PCs or laptops and one printer in the office or at home, it makes sense to organize the ability to send files for printing from each workstation. Of course, such a transformation of a printing device into a network device will become much more attractive in terms of ease of use and economic benefits when the number of computers is much more than two. After all, connecting your own printer to each of them is, firstly, expensive in terms of initial investments for the purchase of the required number of devices. Secondly, to accommodate so many devices will require a lot of space. And thirdly, the operation of the equipment will also cost a pretty penny. Even something as inexpensive as Refilling cartridges in a good service center in this case will cost much more. Judge for yourself: after all, it is one thing to update the resource of a single consumable, and another, for example, five or more cartridges. So, let's find out how to turn your printer into a network printer, what to print on it from different home or office computers.
What should be provided first?
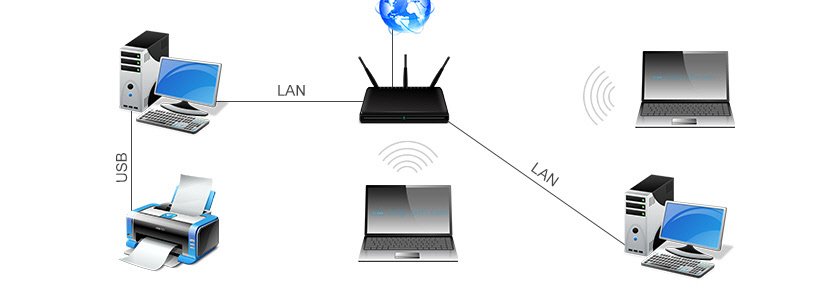
To organize access to network printing, it is important to meet a number of conditions. First of all, you need to connect all PCs and laptops to a local network. Next, you need to connect a printer to one computer (acting as the main one in the printing issue), which is ready to become a network one. Naturally, in the case of organizing a network using a wireless connection, all workstations must be connected to the Internet, and the main computer must be in the visibility zone of other devices. It is clear that you need to install the necessary software on it to be able to print and allow access to the printing device. Also, you can not do without finding out the IP-name of the printer.
How to set up a network printer
As usual in such cases, it is necessary to perform a sequence of actions:
We start with the main PC. Open "Start" and go to the "Printers and Faxes" section.
Click on "Add a printer" and then "Add a local printer". Select the desired printer port.
Install the software for the printer (usually from a disk or download it on the Internet), prescribe the path to find the driver.
Specify the IP name of the device for printing.
After installing the software, you need to allow printer sharing.
Next, we agree to use this printing device by default.
In order not to be required to enter a login and password every time you use a printing device on PCs connected to a network, you need to enter the Network Control Center through Network Connection and enable network discovery, file sharing for computers connected to a local network, and also , on the contrary, disable the need to login with a password.
Now the printer has become a network printer, but you need to go through the procedure of adding a machine to complete the setup on each of the networked PCs. You should start with "Printer Setup" through the "Control Panel". In this case, select "Add a network, wireless printer."
Click on "The printer I want is missing", and then on "Select a shared printer by name".
Specify the device type as TCP/IP and the name or IP address of the device to be printed.
Uncheck the box next to "Select driver automatically".
Open the "Driver installation" tab and specify the model of the device. If it is not in the list, then click "Install from disk" and write the path to the files with the software that was already installed when setting up the main computer.
That's all! The network printer is configured and all workstations can send files for printing.