

To free up space on drive C or move a game to a new SSD, use Steam’s Storage settings. The client moves the installed game to another library by itself. You usually don’t need to cut its folder by hand or download everything again.
First, pin down the task: moving between drives on one PC, moving to another computer and moving the Steam client itself are different operations. The first case is covered in detail below, and for the second there is a separate method over the local network.
Which method to choose
| What you want to do | Where to start |
|---|---|
| Free up C by moving an installed game to D | Steam’s Storage settings and the Move command |
| Move several games to a new drive | Create a library and move the games in batches |
| Use the files on another computer at home | Game file transfer over the local network |
| Get back a game whose files are there, but Steam doesn’t see them | Connect the right library and check that the files are detected |
| Reinstall Windows or move the whole client | First prepare your saves and a recovery plan separately |
If your goal is to move a Steam game from drive C to drive D, the first scenario is enough. Start with one game and move on to the rest after checking the result.
What to check before moving
Space on the target drive
Compare the free space with the size of the installed game. Don’t go by the download size in the store alone: you need the actual size of the files on your computer.
Leave headroom for updates and further use. For example, with a 90 GB installed game and 95 GB free, the drive will be almost full. Even if the move fits, that little headroom is inconvenient afterwards. There is no single percentage for every game: update requirements differ.
The state of the game and the computer
Close the game and any tools that go with it. Wait for any active operations on its files to finish. On a laptop, plug in the power and don’t plan to shut it down in the middle of the move.
If the drive keeps disappearing from the system or is already throwing errors, deal with that first. Moving a large library should not be the way to find out whether the drive works.
Saves
Before you start, make sure your latest save loads. For an important playthrough, make a separate copy of the progress files following the developer’s instructions.
Moving a game with Steam’s Storage settings
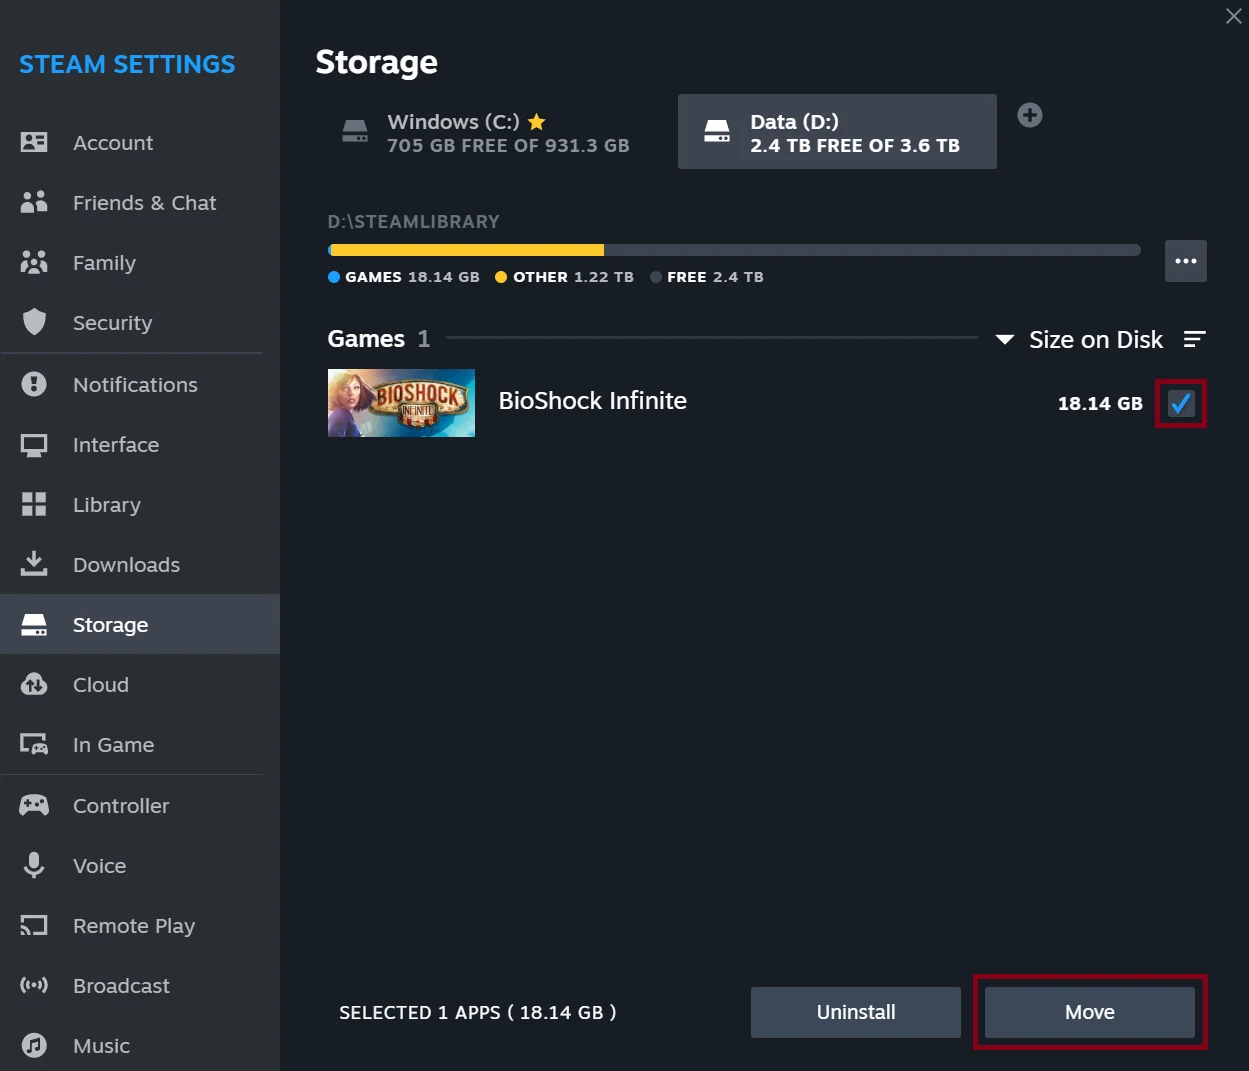
The illustration from Valve’s Steam Support shows the Storage section, a selected game and the Move button. The layout in your version of the client may differ.
Open the Storage Manager
In the client, go to Steam → Settings → Storage. Select the source drive: the installed game should be listed there.
Result: You can see the source drive and its list of games.
Add the destination
Use the option for adding a drive or path and create a library on the drive you want. For example, the folder on D could be called D:\SteamLibrary. The letter and the name are an example, not a required value.
Result: There is a library on the target drive.
Select the game
Go back to the source drive, tick the game and click Move. Choose the destination library and confirm. You can repeat this for several games.
Result: The game and the destination are selected.
Wait for it to finish
Don’t disconnect the drives or force the client to close. When it’s done, make sure the game appears in the library on the new drive.
Result: The game shows up on the new drive.
Check the result
Launch the game from Steam, load your latest save and try a few things you usually do. Then check the free space on the source drive. If everything is fine, move on to the next game.
Result: The game launches and the save is available.
Moving from an HDD to an SSD: what to expect
Choosing the library works the same way. What matters is that the target is the right physical drive: the letter D alone doesn’t tell you it’s an SSD. C and D can be partitions of the same device.
When you plan to move a Steam game from an HDD to an SSD, decide in advance which games you really want on the faster drive. It’s easier to start with the ones you play most than to move the whole archive at once.
Don’t expect a fixed FPS gain from changing the install location. Moving files doesn’t change your graphics card, processor or graphics settings. The effect has to be judged for a particular game and system; there are no universal percentages here.
If something goes wrong
| Symptom | First check | What not to do right away |
|---|---|---|
| No suitable destination | Whether the library was added and the drive is available in the system | Format the drive |
| Not enough space | The game’s actual size and the free space | Delete saves to gain a few megabytes |
| The game shows as not installed | Whether the library with its files is connected | Wipe the existing folder |
| The game won’t launch | The error message and file integrity | Move the library back and forth blindly |
| Progress is gone | The account, profile and save location | Overwrite the only copy |
| The drive drops out during the move | The drive’s connection and health | Repeat a large move over and over |
You can’t choose another drive
Start simple: check that the system sees the drive and that a Steam library has been created on it. Having a free drive is not enough — the client needs an install location.
If the problem shows up after a restart, write down the exact message. “Not enough space”, “access denied” and a missing drive are different situations. Don’t change permissions on all system folders or turn off your computer’s protection because of a one-size-fits-all tip from the internet.
Steam doesn’t see the game after the move
If Steam doesn’t see the game after the move, check where the files actually are and which library is connected. The problem may be in how the install location is registered, not in lost content.
Steam can detect existing files when you start an install into the right location. Check the target folder carefully before confirming: a new install into another folder won’t fix the old one not being detected.
Along the way, the client may check the content and download what’s missing. The install screen appearing doesn’t by itself prove it is downloading everything again. Don’t delete the only surviving copy of the files until the game launches successfully.
The game won’t launch or reports missing files
Open the game’s Properties in your library and go to Installed Files. Run Verify integrity of game files. The client compares the data and restores the files it needs.
Check one game at a time and wait for it to finish. Valve notes separately that some local configuration files may fail verification; such a message doesn’t always mean the installation is damaged.
If the error persists, save its text. A game with a third-party launcher may need the launcher diagnosed separately. Don’t confuse a launcher fault with a library location problem.
The save didn’t load
Check that you’re signed in to the right account and have opened the same game profile. Then find the save folder following the developer’s instructions and compare it with the copy you prepared.
Don’t start by deleting cloud data or overwriting files at random. First work out which copy holds the playthrough you need. If you only moved the game between drives on one PC, think separately about what else was done: switching Windows users or reinstalling the system changes the situation significantly.
Can you move a game to an external drive?
This scenario calls for particular care with the connection. Valve does not recommend external drives for Steam and games because of possible performance problems and unexpected disconnections.
If the game is already on an external drive, connect it before starting the client and don’t disconnect it while it’s running. If the library disappears, check the connection first. Reinstalling won’t fix a faulty cable or a drive that keeps dropping out.
For a permanent library, choose an internal drive whenever you can. If you can’t, keep the limits of an external connection in mind when planning the move.
How to move a Steam game to another computer without downloading it all again
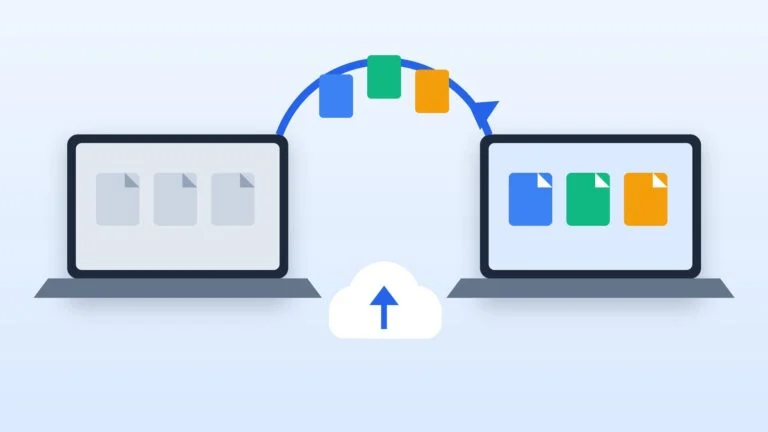
Steam has Game File Transfer over Local Network for this. You can move a Steam game to another computer this way when both clients are online on the same local network and their settings allow transfers.
On the source computer, the game must be up to date and the client must have no games running and no downloads in progress. On the second computer, start the install: Steam can get the matching files from the first device. If the local source becomes unavailable, the remaining data may download from Steam’s servers.
FAQ
Do I need to move Steam itself along with the game?
No. To change where an installed game lives, use a library on another drive. Moving the whole client is a separate task you don’t need just to free up space for one game.
Do I have to download the whole game again?
A regular move between drives uses the installed files. Extra downloads are still possible, for example for an update or to restore missing data. Saying “not a single byte from the internet” would be wrong.
How long does the move take?
It depends on the size and structure of the files, the drives and the current load. So for a first try, pick one game and see the real pace. A promise like “any game in five minutes” makes no sense.
Can I delete the old folder by hand?
After a successful regular move, you usually don’t need to clean up the game folder by hand. If you made copies yourself before, first work out which one is in use, launch the game and check your save. Don’t go by similar folder names alone.
What about mods?
Save your mod list, settings and mod manager data separately. A clean game working doesn’t prove the whole set of mods has been restored too. After the move, check that it launches with your usual setup.
Checklist after the move
- The game is on the drive you planned.
- It launches from the client.
- Your latest save is available.
- The mods you need and any third-party launcher work.
- Space has been freed on the source drive.
- The new drive still has room for further use.
This check completes the move. If any item fails, sort it out first and only then move the rest of your library.


Leave a Reply